")
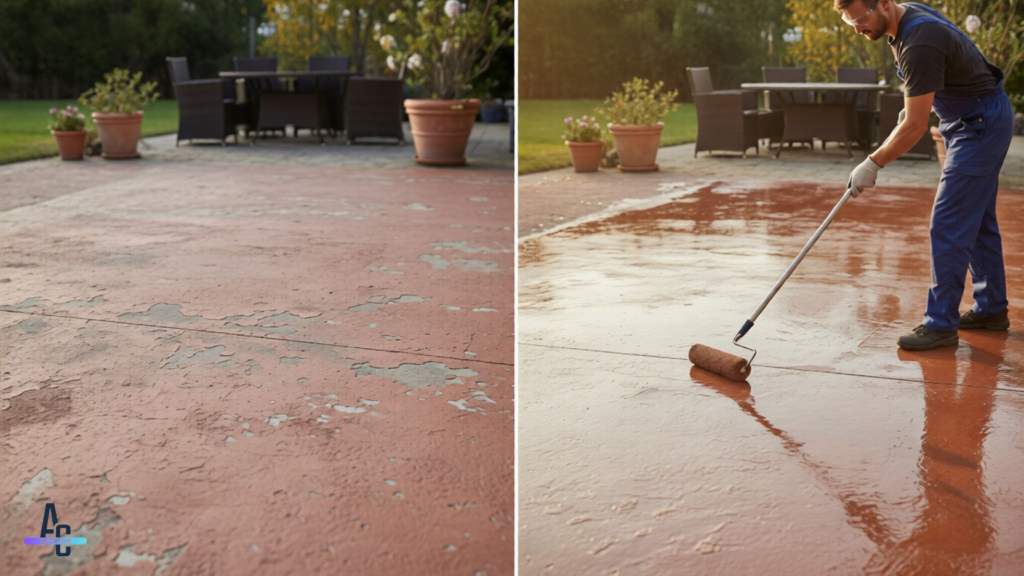
Sealing stamped concrete is one of the most important steps in protecting both its appearance and its structural integrity. A stamped patio is decorative concrete; it’s meant to look good and last. Without proper sealing, color fades, moisture penetrates, and surface wear accelerates.
If you’re asking how to seal my stamped concrete patio, you’re likely trying to preserve the finish, prevent damage, or restore a patio that’s starting to look tired. This guide walks through what sealing actually does, when it’s necessary, how to do it correctly, and how to avoid the mistakes that cause most seal failures.
Why This Matters (Problem + Benefit)
Stamped concrete is more vulnerable than plain concrete because it’s textured, colored, and often exposed to sun, rain, and foot traffic.
If sealing is ignored or done poorly:
- Color fades unevenly
- Moisture gets trapped and causes whitening or peeling
- Surface abrasion wears down the texture
- Freeze-thaw cycles accelerate cracking
When sealing is done correctly:
- Color depth and contrast are preserved
- Water resistance improves dramatically
- Cleaning becomes easier
- The surface lasts longer with fewer repairs
This isn’t about cosmetics alone. Proper sealing is preventive maintenance.
Core Explanation: What Sealing Really Does
What sealing is
Sealing is the application of a protective liquid coating that penetrates or films over the concrete surface. It blocks moisture, resists staining, and shields the color hardener or release agents embedded in the slab.
How it works
A quality sealer fills microscopic pores in the concrete. Some soak in; others form a thin protective layer on top. Both approaches reduce water absorption and surface wear when applied correctly.
When sealing is necessary
- New stamped concrete (after full curing)
- Patios exposed to sun, rain, or freeze-thaw cycles
- Surfaces showing fading, chalkiness, or water absorption
When sealing is not necessary
- Very new concrete that hasn’t cured
- Surfaces with trapped moisture or existing sealer failure
- Cold, damp conditions that prevent proper drying
Timing matters as much as the product.
Sealer Types and Options (What Actually Works)
Acrylic Sealers
Pros: Enhances color, affordable, easy to apply
Cons: Shorter lifespan, needs reapplication
Best for: Decorative patios where appearance matters most
Penetrating Sealers
Pros: Natural look, breathable, no peeling
Cons: Minimal color enhancement
Best for: Subtle finishes or moisture-prone areas
Polyurethane or Epoxy Sealers
Pros: Very durable
Cons: Less forgiving, can trap moisture, not ideal outdoors
Best for: Rare outdoor cases with professional installation
Low-quality sealers fail early because they don’t breathe or bond properly. Most peeling issues trace back to the wrong sealer choice, not bad concrete.
Key Characteristics to Look For
- Breathability: Prevents moisture from being trapped beneath the surface
- UV resistance: Protects color from sun fading
- Slip resistance: Critical for safety when wet
- Compatibility: Must work with existing sealers or color treatments
- Recoat ability: Allows future maintenance without stripping
Each of these affects performance, not just appearance.
Application Process (High-Level, Correct Approach)
Step 1: Clean thoroughly
Remove dirt, mildew, efflorescence, and old residue. Any contamination will interfere with bonding.
Step 2: Allow full drying
Concrete must be completely dry often 24–48 hours depending on weather.
Step 3: Apply in proper conditions
Ideal temperatures are mild and dry. Avoid direct midday sun or high humidity.
Step 4: Apply thin, even coats
Over-application causes bubbling, whitening, or peeling. Two thin coats outperform one heavy coat.
Step 5: Cure before use
Foot traffic too soon ruins adhesion. Patience here prevents failure.
Most problems occur due to rushing prep or sealing damp concrete.
Tools and Materials
- Pressure washer or stiff-bristle brush
- Mild concrete cleaner
- Pump sprayer or roller with extension pole
- Non-slip additive (if required)
- Protective gloves and footwear
No specialty tools are required, but cleanliness and control are critical.
Expert Tips for Long-Term Results
- Reseal every 2–3 years depending on exposure
- Clean gently avoid harsh degreasers
- Watch for dull spots or uneven darkening after rain
- Address wear early before full failure occurs
A patio doesn’t suddenly fail; it gives warning signs first.
Frequently Asked Questions
How long should concrete cure before sealing?
Typically 28 days for new concrete. Always confirm moisture levels before sealing.
What happens if I don’t seal it?
Fading, staining, surface wear, and accelerated deterioration are common.
Can I reseal over an old sealer?
Sometimes. Compatibility and condition matter. Peeling sealers must be removed first.
How do I know my sealer is failing?
Cloudiness, flaking, or water soaking unevenly are common indicators.
Is sealing slippery?
It can be without a slip-resistant additive. This is especially important around pools.
How often should I reseal?
Every 2–3 years for most patios, sooner in high-sun or high-traffic areas.
Final Professional Perspective
Sealing stamped concrete isn’t difficult, but it is precise. Most failures aren’t caused by the concrete, they’re caused by poor preparation, wrong products, or bad timing. When done thoughtfully, sealing preserves both the look and function of your patio for years without unnecessary repairs.