How to Reseal a Stamped Concrete Patio: A Complete Expert Guide
A stamped concrete patio represents a significant investment in your outdoor living space, offering the aesthetic appeal of natural stone or brick at a fraction of the cost. However, like all concrete surfaces exposed to the elements, stamped concrete requires periodic resealing to maintain its beauty and structural integrity. Without proper maintenance, your once-vibrant patio can fade, crack, and deteriorate, compromising both its appearance and longevity.
This comprehensive guide walks you through everything you need to know about how to reseal a stamped concrete patio, from identifying when resealing is necessary to executing the job with professional-quality results. Whether you’re a seasoned DIY enthusiast or tackling this project for the first time, you’ll gain the knowledge and confidence to protect your outdoor investment for years to come.
Why Resealing Your Stamped Concrete Patio Matters
Stamped concrete patios combine functionality with decorative appeal, but the sealer that protects the surface breaks down over time. According to concrete maintenance experts at Angi, resealing serves multiple critical functions that directly impact your patio’s lifespan and appearance.
Protection Against Weather Damage
San Antonio’s climate presents unique challenges for outdoor concrete surfaces. The combination of intense UV radiation, temperature fluctuations, and occasional heavy rainfall accelerates sealer degradation. A quality sealer acts as a barrier against moisture penetration that leads to freeze-thaw damage, UV rays that cause fading and discoloration, surface erosion from wind-blown debris, and staining from organic matter and oil.
Preserving Aesthetic Value
The distinctive patterns and colors that make stamped concrete attractive depend entirely on the protective sealer. Without it, the surface becomes dull, colors fade unevenly, and the detailed stamp patterns lose definition. Homeowners who maintain regular resealing schedules report significantly better color retention and surface appearance over decades of use.
Structural Integrity And Cost Savings
Beyond aesthetics, resealing prevents deeper structural issues. Water infiltration through unsealed concrete can cause internal damage that requires costly repairs or complete replacement. The relatively modest investment in resealing every 2-3 years prevents exponentially more expensive interventions down the line.
Signs Your Stamped Concrete Needs Resealing
Knowing when to reseal is as important as knowing how. Several telltale indicators signal that your patio’s protective barrier has degraded beyond effective performance.
The Water Absorption Test
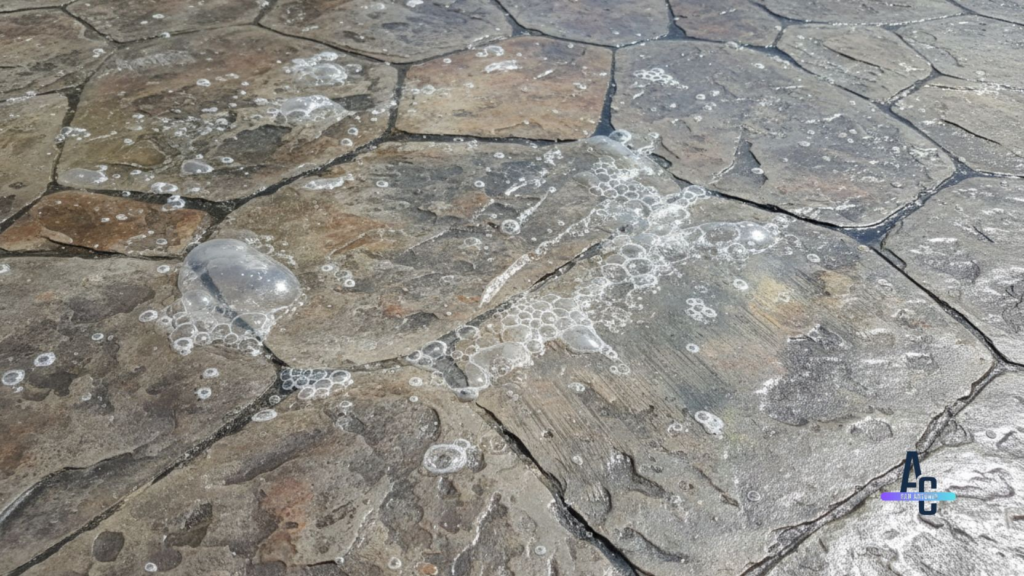
The most reliable test involves sprinkling water on the surface. If water beads up and rolls off, the sealer is still functional. However, if water soaks into the concrete within a few minutes, leaving dark spots, resealing is overdue. This simple test provides definitive evidence of sealer condition.
Visual Indicators
Fading or Dull Appearance: When your once-glossy or satin-finish patio looks flat and lifeless, the sealer has likely worn away. Compare high-traffic areas to protected spots under furniture significant differences indicate uneven sealer wear.
Surface Roughness: Run your hand across the patio. Freshly sealed stamped concrete feels relatively smooth, while worn sealer leaves the surface rough and textured, making it more susceptible to dirt accumulation.
Efflorescence: White, powdery deposits on the surface indicate moisture is penetrating the concrete and bringing salts to the surface a clear sign that the sealer has failed and requires immediate attention.
Essential Tools And Materials
Proper equipment ensures professional-quality results and makes the resealing process more efficient and enjoyable.
Cleaning Equipment
- Pressure washer (1500-3000 PSI) with fan tip nozzle
- Stiff-bristle push broom or deck brush
- Concrete cleaner/degreaser (pH-neutral formula recommended)
- Garden hose with spray nozzle
Sealer Application Tools
- Pump sprayer (1-2 gallon capacity) or roller with extension pole
- Paint tray (if using roller method)
- Paintbrush (3-4 inch) for edges and detail work
- Plastic sheeting and painter’s tape for protecting adjacent surfaces
Safety Equipment
- Safety glasses and chemical-resistant gloves
- Respirator mask (if using solvent-based sealer)
- Old clothing that can be disposed of if splattered
Choosing The Right Sealer
According to home improvement professionals on HomeAdvisor, two main categories dominate the market:
Water-Based Acrylic Sealers: These offer easier application, lower odor, and environmental friendliness. They provide a natural, low-sheen finish and excellent breathability, though they typically require more frequent reapplication than solvent-based alternatives.
Solvent-Based Sealers: These penetrate deeper, offer superior color enhancement, and provide longer-lasting protection with higher gloss levels. However, they emit strong fumes and require more careful application.
For most San Antonio homeowners, a high-quality water-based acrylic sealer with UV inhibitors offers the best balance of performance, ease of application, and environmental responsibility.
Step-By-Step Resealing Process
Thorough preparation accounts for 70% of the project’s success. Follow these steps carefully for optimal results.
Step 1: Clean The Surface Thoroughly
Remove Debris: Sweep the entire patio thoroughly, paying special attention to expansion joints and stamped pattern grooves where dirt accumulates.
Pressure Wash: Using a fan-tip nozzle held 12-18 inches from the surface, systematically pressure wash the entire patio. Work in overlapping passes, maintaining consistent distance to avoid etching patterns into the concrete. Concentrate on areas with heavy soiling, but avoid blasting away the concrete surface itself.
Address Stains: Pre-treat oil stains, rust marks, and organic growth before general cleaning. Apply appropriate cleaners according to manufacturer instructions, allowing sufficient dwell time for chemical action.
Final Rinse: Thoroughly rinse all cleaning products from the surface, ensuring no residue remains that could interfere with sealer bonding.
Step 2: Allow Proper Drying Time
This critical yet often overlooked step determines sealer performance. Concrete must be completely dry before sealer application applying sealer to damp concrete traps moisture, causing cloudiness, poor adhesion, and premature failure.
Minimum Drying Period: Allow 24-48 hours of dry, warm weather after cleaning. In humid conditions or shaded areas, extend drying time to 72 hours.
Moisture Test: Tape a 2-foot square of plastic sheeting to the concrete, sealing all edges. After 24 hours, check for condensation on the plastic’s underside or darkening of the concrete beneath. Either indicates insufficient drying.
Step 3: Make Minor Repairs
Address small cracks and chips before resealing to prevent moisture infiltration and further damage.
Crack Filling: Clean cracks thoroughly and fill with appropriate concrete crack filler or flexible sealant. For cracks wider than 1/4 inch, consult a professional to assess underlying structural issues.
Surface Patching: Use concrete patching compound to repair spalled or chipped areas. Feather edges for seamless blending, and allow patches to cure fully before proceeding.
Step 4: Protect Surrounding Areas
Cover adjacent landscaping with plastic sheeting, tape edges where patio meets house siding, and protect door thresholds and window frames from overspray.
Step 5: Apply The First Coat
Test Application: Before committing to the full project, apply sealer to a small, inconspicuous area. This reveals how the sealer interacts with your specific concrete, allowing you to adjust application technique if necessary.
Application Technique: Pour sealer into a pump sprayer or paint tray. Apply sealer in thin, even coats using overlapping passes. Hold the sprayer 12-18 inches from the surface and maintain steady movement to prevent pooling.
Work Pattern: Start at the point farthest from your exit and work backward toward your exit point. This prevents walking on freshly sealed areas.
Manage Excess: Monitor for puddles or excess accumulation, especially in stamped pattern depressions. If pooling occurs, immediately spread excess with a rubber squeegee, working it into adjacent areas. The goal is a thin, uniform film across the entire surface.
Step 6: Apply The Second Coat
Most situations benefit from two thin coats rather than one heavy application. Thin coats cure properly, provide better durability, and avoid problems associated with overapplication.
Timing Between Coats: Water-based sealers typically require 2-4 hours drying time between coats, while solvent-based products need 4-8 hours. Check manufacturer recommendations and adjust for temperature and humidity.
Application Direction: Apply the second coat perpendicular to the first for maximum coverage and uniformity.
Step 7: Allow Proper Curing
Initial Curing: Keep the surface completely undisturbed for 24 hours after the final coat. Protect from rain, dew, and foot traffic during this critical period.
Full Cure Time: While the sealer may feel dry to the touch within hours, full curing takes 48-72 hours. Avoid placing furniture or heavy activities until fully cured.
Common Mistakes To Avoid
Learning from others’ errors saves time, money, and frustration. These frequent pitfalls can derail otherwise well-executed resealing projects.
Overapplication
The single most common mistake involves applying sealer too heavily. Excess sealer creates a thick, plastic-looking surface prone to peeling, whitening, and premature failure. Remember: two thin coats outperform one thick coat every time.
Inadequate Surface Preparation
Skipping thorough cleaning or applying sealer to damp concrete guarantees poor results. Dirt, grease, and moisture prevent proper sealer adhesion, leading to patchy coverage and early failure.
Wrong Weather Conditions
Applying sealer during temperature extremes or high humidity invites problems. Always check the forecast and follow manufacturer temperature guidelines ideal conditions are 50-85°F with low humidity.
Ignoring Manufacturer Instructions
Different sealer products have specific requirements for application, drying times, and recoat windows. Always read and follow the technical data sheet for your chosen sealer.
Professional VS. DIY: Making The Right Choice
While resealing a stamped concrete patio is within reach for confident DIYers, certain situations warrant professional expertise.
When DIY Makes Sense
Consider handling resealing yourself if your patio is in good structural condition, you have experience with similar projects, the patio size is manageable (under 500 square feet), and weather conditions are favorable.
When To Call Professionals
Engage experienced concrete contractors when significant damage exists, you have complex layouts with multiple levels, time constraints are tight, or the patio exceeds 1,000 square feet.
Professional Advantages
Experienced contractors bring specialized equipment, proven techniques, and efficiency that ensure optimal results. They understand how different concrete conditions affect sealer selection and application. Additionally, reputable contractors warranty their work, providing peace of mind.
At Affordable Concrete San Antonio, our team has perfected stamped concrete installation and maintenance over 14 years of service. We understand the unique challenges San Antonio’s climate presents and use professional-grade products that outperform consumer alternatives. Our concrete patio services include comprehensive resealing with thorough surface preparation, optimal product selection, and meticulous application techniques.
Whether you need resealing for an existing patio or are considering a new stamped concrete installation, our experienced team delivers exceptional results backed by extensive local expertise. Contact us at 713-504-2341 or visit our office at 1247 W Thompson Pl, San Antonio, TX 78226 for a free estimate and consultation.
Conclusion
Learning how to reseal a stamped concrete patio empowers homeowners to protect their outdoor investment and maintain stunning curb appeal for decades. While the process requires careful planning and attention to detail, the results a revitalized, protected patio reward the effort many times over.
For San Antonio homeowners seeking expert assistance with stamped concrete patio maintenance or installation, Affordable Concrete San Antonio stands ready to deliver exceptional results. From standard concrete patios to elaborate decorative stamped designs, we transform outdoor spaces with meticulous craftsmanship and unwavering attention to quality.
Ready to restore your patio’s beauty? Contact our team today for a free consultation. Call 713-504-2341 or visit us at 1247 W Thompson Pl, San Antonio, TX 78226.