How to Demo a Concrete Patio: A Complete Step-by-Step Guide
If your concrete patio is cracked, sunken, or simply past its prime, demolition is often the first step toward a beautiful new outdoor space. Knowing how to demo a concrete patio correctly without damaging underground utilities, injuring yourself, or creating a costly disposal mess can mean the difference between a smooth project and an expensive headache.
This guide walks you through the entire process, from preparation to debris removal, with insights drawn from real-world concrete work in South Texas.
Should You Demo Or Resurface?
Before swinging a sledgehammer, ask yourself whether full demolition is actually necessary. According to Angi’s cost guides for concrete work, homeowners often spend more on demo than they need to because they skip the resurfacing option entirely.
Demo is the right call when:
- The slab is structurally compromised (heaving, major cracking, or sinking)
- Tree roots have lifted or fractured large sections
- The base has eroded and drainage problems are severe
- You’re changing the layout, size, or grade of the patio
Resurfacing makes more sense when:
- Surface cracks are hairline or cosmetic
- The base and slab are structurally sound
- You want a cost-effective refresh without full replacement
If the slab passes a basic structural test no rocking, no soft spots, no active water intrusion resurfacing with a decorative overlay can restore it for a fraction of the cost of full demo and replacement.
Tools And Equipment You’ll Need
Concrete demolition is physically demanding and requires the right equipment. Using undersized tools on a thick slab is one of the most common DIY mistakes.
| Tool | Purpose |
| Electric jackhammer or rotary hammer | Breaking thick slabs (4″+ concrete) |
| Sledgehammer (10–16 lb) | Breaking thinner sections |
| Pry bar / bolt cutters | Removing rebar and wire mesh |
| Angle grinder with diamond blade | Cutting control joints or edges |
| Circular saw with masonry blade | Scoring cut lines |
| Wheelbarrow | Moving debris |
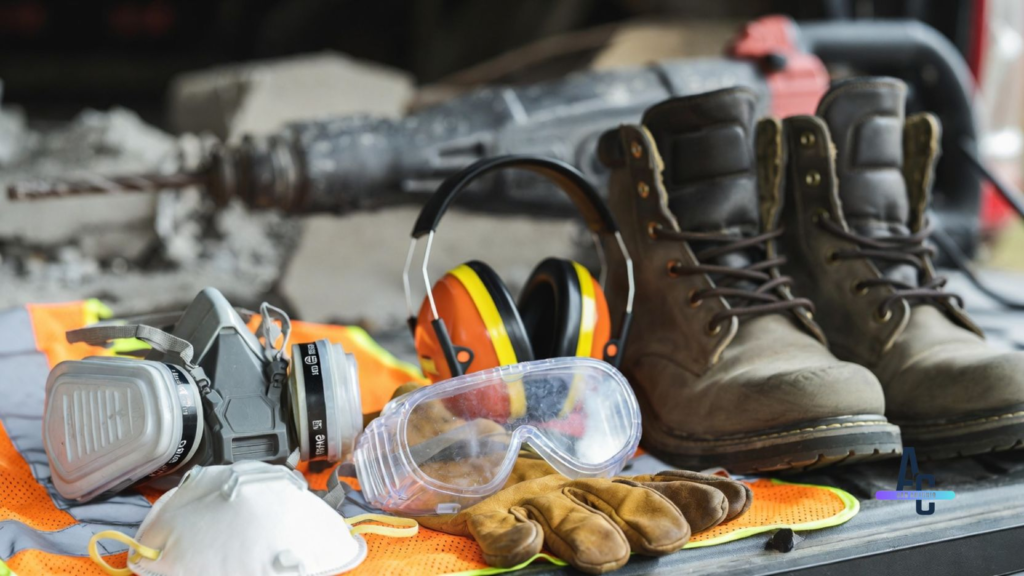
| Safety goggles, gloves, steel-toed boots | Personal protection |
| Dust mask (N95 minimum) | Silica dust protection |
| Work gloves (heavy leather) | Handling broken concrete edges |
For slabs thicker than 4 inches which is common in Texas due to expansive clay soils renting an electric demolition hammer (60–70 lbs class) from a local equipment rental company is strongly recommended over a standard sledgehammer alone.
Safety Precautions Before You Start
Concrete demolition generates silica dust, which is a serious respiratory hazard with cumulative long-term effects. OSHA’s silica dust standards require proper respiratory protection on all concrete cutting and breaking work.
Before breaking a single piece of concrete:
- Call 811 (Dig Safe) Call at least 72 hours before any work. Underground utility lines (gas, water, electric) may run beneath or adjacent to your patio slab. This is not optional.
- Locate and mark irrigation lines Many San Antonio homes have in-ground irrigation systems that aren’t always on utility maps.
- Assess rebar presence Older slabs (pre-2000) may have minimal reinforcement; newer ones typically have rebar on 18″ centers or wire mesh. Plan accordingly for cutting.
- Wear full PPE Safety glasses, N95 or P100 respirator, leather gloves, steel-toed boots.
- Clear the area Remove all furniture, planters, and grill equipment. Establish a debris staging zone at least 10 feet away.
- Check weather Avoid demo during rain or high winds that can spread silica dust.
How To Demo A Concrete Patio: Step-By-Step
1: Score The Perimeter And Section Lines
Use a circular saw with a diamond masonry blade or angle grinder to score cut lines across the slab in a grid pattern. Sections of roughly 2’x2′ to 3’x3′ are manageable for a single person to lift and move. Scoring gives you controlled break lines rather than random fracture patterns that create large, awkward pieces.
Pro tip: Score at least 1 inch deep to give the sledgehammer or jackhammer a clean break path.
2: Break The Concrete
Start at an edge or corner, never in the center of the slab. Breaking from the middle distributes force poorly and often causes large slab sections to crack unpredictably.
- For slabs under 4 inches thick: A 12–16 lb sledgehammer driven at a 45-degree angle along your scored lines is effective.
- For slabs 4 inches or thicker: Use a rented electric jackhammer. Work in rows following your scored grid.
Strike at the scored lines using consistent, controlled blows. Avoid wild overhead swings, control and body mechanics matter more than brute force.
3: Remove Reinforcement
Once sections are broken, you’ll likely encounter rebar or wire mesh. Use bolt cutters for wire mesh and a reciprocating saw with a metal blade for heavier rebar. Stack rebar separately from concrete many recycling facilities will take it as scrap metal.
Important: Never leave exposed rebar ends pointing upward in a debris pile. Bend or cut them flush to prevent puncture injuries.
4: Break Down Larger Pieces
Any concrete chunk too large for one person to lift (typically over 60–70 lbs) needs to be broken down further before moving. A concrete chunk that looks manageable can be deceptively heavy; standard concrete weighs approximately 150 lbs per cubic foot.
5: Load and Stage Debris
Use a sturdy wheelbarrow to move broken concrete to your staging area or directly into a rental dumpster. Load the heaviest pieces at the bottom. Do not overload concrete is extremely dense and a single wheelbarrow load can easily exceed 200 lbs.
Concrete Disposal: What To Do With The Debris
Disposal is often the most overlooked part of a DIY demo project. Broken concrete cannot go in standard curbside trash bins, and improper dumping is illegal.
Your options:
- Rent a concrete dumpster Companies like Roll Off Dumpster Direct offer concrete-specific bins; standard dumpsters often prohibit concrete due to weight.
- Hire a junk removal service Services like LoadUp or local haulers will load and haul for a flat fee.
- Contact a concrete recycling facility Many facilities in San Antonio accept broken concrete for recycling into road base. This is the most environmentally responsible route.
- Repurpose on-site Clean, broken concrete (urbanite) can be used as fill material, erosion control, or informal garden borders.
Note: Do not place concrete in a green waste or standard dumpster. Most dumpster rental contracts exclude concrete, and overweight charges can be significant.
DIY VS. Hiring A Professional
Concrete demolition is one of those projects where the “DIY savings” calculation often doesn’t hold up once you factor in tool rentals, disposal, and time. Here’s an honest breakdown:
| Factor | DIY | Professional |
| Equipment cost | $200–$500 rental | Included in quote |
| Disposal | $300–$600 dumpster | Typically included |
| Time | Full weekend (2–3 people) | Half-day crew |
| Physical demand | Very high | Handled by crew |
| Risk of utility damage | Higher (operator error) | Lower (experienced crews) |
| Proper base assessment | Unlikely | Standard practice |
According to HomeAdvisor’s concrete demolition cost data, the national average for professional patio demo runs between $600 and $2,500 depending on slab size, thickness, and reinforcement, often comparable to DIY costs once rentals and disposal are factored in.
For a 300–500 sq ft patio in San Antonio, the math frequently favors professional demo, especially when the project is paired with a new installation.
Cost To Demo A Concrete Patio
Concrete demo pricing varies based on several factors:
- Slab thickness: Standard residential patios are 4 inches thick; some are 6 inches. Thicker slabs cost more to break.
- Reinforcement: Rebar-reinforced slabs take longer and require more labor than unreinforced or wire-mesh slabs.
- Access: Tight backyard access that prevents equipment use raises labor costs.
- Disposal fees: Landfill tipping fees and haul distance affect final pricing.
- Square footage: Most contractors price demolition per square foot ($2–$6/sq ft is typical in South Texas).
Estimated demo costs for common patio sizes:
| Patio Size | Estimated Pro Cost |
| 200 sq ft | $400 – $1,000 |
| 400 sq ft | $800 – $2,000 |
| 600 sq ft | $1,200 – $3,000 |
These figures are estimates. Always get an on-site quote, as site conditions significantly affect final pricing.
What Comes After Demolition?
Once your old slab is gone, the opportunity in front of you is substantial. A properly prepared base is the foundation of any high-performing concrete installation and this is where the quality of your contractor truly shows.
Post-demo steps a qualified contractor should perform:
- Subgrade inspection Identify any soft spots, poor drainage areas, or tree root intrusion that contributed to the original slab’s failure.
- Base preparation Compact native soil, add and compact gravel base (typically 4″ minimum in San Antonio’s clay-heavy soils).
- Grading for drainage Slope away from the structure at minimum 1/8″ per foot.
- Form setting Establish forms that define the new slab’s shape, thickness, and elevation.
- Reinforcement placement Rebar or wire mesh positioned correctly within the slab depth.
- Pour, finish, and cure Quality concrete work in Texas requires attention to temperature timing, especially during summer months when rapid evaporation can compromise surface strength.
Ready For A New Concrete Patio In San Antonio?
Demolition is just the beginning. The real transformation happens when skilled craftsmen replace that old slab with something built to last and built to impress.
Affordable Concrete San Antonio has completed 8,000+ projects across San Antonio and holds 1,000+ five-star reviews from homeowners who’ve been through exactly this process. Owner Ted and his team handle the full project from demo and disposal to base prep, pour, and finishing so you don’t have to coordinate multiple contractors or manage disposal logistics yourself.
Whether you want a smooth brushed finish, an intricate stamped pattern, or a custom stained surface that complements your home’s exterior, the team at Affordable Concrete San Antonio delivers results that consistently exceed expectations.
Call today for your free on-site consultation and quote: 713-504-2341 Email: info@affordableconcretesanantonio.com, 1247 W Thompson Pl, San Antonio, TX 78226