
Sealing a stamped concrete patio isn’t just a finishing touch, it’s a critical preservation step that protects color, prevents damage, and extends the life of the surface. When done correctly, sealing enhances appearance, resists stains, blocks moisture, and reduces long-term maintenance. When done wrong, it can trap moisture, peel, discolor, or fail within months.
This guide explains how to seal a stamped concrete patio properly, based on real contractor experience, manufacturer standards, and proven field practices. It’s written to meet homeowner DIY needs while also aligning with professional-grade expectations.
What Sealing a Stamped Concrete Patio Does
Stamped concrete is decorative by nature, but concrete itself is porous. Without a protective sealer, moisture, UV rays, oils, dirt, and organic debris penetrate the surface over time.
Sealing a stamped concrete patio:
- Deepens and enhances color contrast
- Protects against water absorption and freeze–thaw cycles
- Prevents fading caused by UV exposure
- Reduces staining from food, grease, and leaves
- Makes cleaning faster and easier
In short, sealing turns stamped concrete from a decorative surface into a durable, weather-resistant outdoor system.
When to Seal Stamped Concrete
Timing matters more than most homeowners realize.
New Stamped Concrete
- Wait 28–30 days after installation
- Concrete must fully cure and release internal moisture
- Sealing too early can cause whitening or bubbling
Existing or Previously Sealed Concrete
- Seal only after thorough cleaning and full drying
- If resealing, ensure the old sealer is compatible or removed
Best Weather Conditions
- Temperature: 50°F–85°F (10°C–30°C)
- Dry conditions with no rain for at least 24–48 hours
- Avoid direct midday sun during application
Types of Stamped Concrete Sealers (Pros & Cons)
Choosing the right sealer is one of the most important decisions in the process.
Acrylic Sealers (Most Common)
Best for: Residential patios
- Enhances color (“wet look” option available)
- Easy to apply and recoat
- Affordable
Drawbacks:
- Shorter lifespan (2–3 years)
- Can become slippery without additives
Polyurethane Sealers
Best for: High-traffic patios
- Extremely durable
- Superior stain resistance
Drawbacks:
- More expensive
- Requires professional-level application
Penetrating Sealers
Best for: Natural or matte finishes
- Invisible protection
- No peeling or film buildup
Drawbacks:
- No color enhancement
- Less protection against surface wear
Expert tip: Most stamped concrete patios perform best with a solvent-based acrylic sealer plus anti-slip additive.
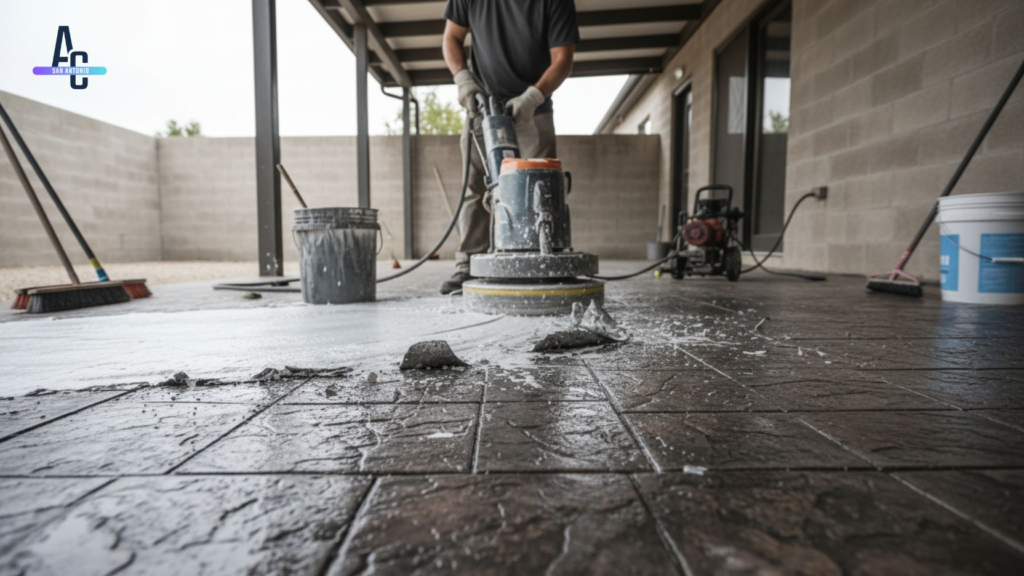
How to Prepare a Stamped Concrete Patio for Sealing
Preparation is where most failures happen.
1. Clean the Surface Thoroughly
- Sweep away dirt and debris
- Wash using mild detergent or concrete cleaner
- Remove grease, mildew, and stains completely
2. Remove Old or Failing Sealer (If Needed)
- Flaking or cloudy sealer must be stripped
- Use a chemical sealer stripper or professional grinding
3. Let the Concrete Dry Completely
- Minimum: 24 hours
- Ideal: 48 hours in dry weather
- Moisture trapped under sealer causes whitening and peeling
Step-by-Step: How to Seal a Stamped Concrete Patio
1. Choose the Right Application Tool
- Pump sprayer for even coverage
- 3/8″ nap roller for back-rolling
- Avoid thick rollers that cause pooling
2. Apply the First Coat
- Apply in thin, even layers
- Work in small sections
- Keep a wet edge to avoid lap marks
3. Allow Proper Dry Time
- Typically 2–4 hours between coats
- Follow manufacturer recommendations
4. Apply the Second Coat
- Apply perpendicular to the first coat
- Add anti-slip additive if needed
How Many Coats to Apply
For most stamped concrete patios:
- Two thin coats = ideal protection
- Avoid thick, glossy buildup
- More sealer ≠ better performance
Over-application is a leading cause of peeling and discoloration.
Drying and Curing Time
- Light foot traffic: 24 hours
- Furniture placement: 48–72 hours
- Full cure: 5–7 days
Avoid water exposure during the curing period.
Common Mistakes That Cause Sealer Failure
- Sealing damp concrete
- Applying too thick of a coat
- Using incompatible sealers
- Sealing in direct sunlight
- Skipping surface cleaning
Most sealer failures are preventable with proper prep and patience.
How Often to Reseal Stamped Concrete
Resealing frequency depends on usage and climate:
- Light use: every 3 years
- Moderate use: every 2 years
- Heavy traffic or full sun: annually
If water stops beading on the surface, it’s time to reseal.
Post-Sealing Maintenance Tips
- Clean with mild soap and water
- Avoid harsh chemicals or pressure washing
- Use furniture pads to prevent scratching
- Rinse debris regularly
Proper maintenance can double the lifespan of a sealer.
DIY vs Professional Sealing
DIY Sealing Makes Sense If:
- The patio is in good condition
- You’re comfortable with prep and timing
- You use the correct materials
Hire a Professional If:
- Sealer failure already exists
- The patio has discoloration or peeling
- You want long-term warranty protection
Professional sealing often costs more upfront but reduces long-term repair risks.
Frequently Asked Questions
Can I seal stamped concrete myself?
Yes, with proper prep and the right sealer.
Does sealing make concrete slippery?
It can. Use anti-slip additives to reduce risk.
Can I change the color when sealing?
Sealers enhance existing color but won’t change it.
What happens if I don’t seal stamped concrete?
Fading, staining, moisture damage, and premature wear.
Final Thoughts
Knowing how to seal a stamped concrete patio properly can mean the difference between a surface that lasts decades and one that fails prematurely. With the right sealer, preparation, and application technique, sealing becomes a straightforward process with long-term rewards.
When in doubt, slow down, follow manufacturer instructions, and prioritize surface prep. Stamped concrete rewards precision and punishes shortcuts.