
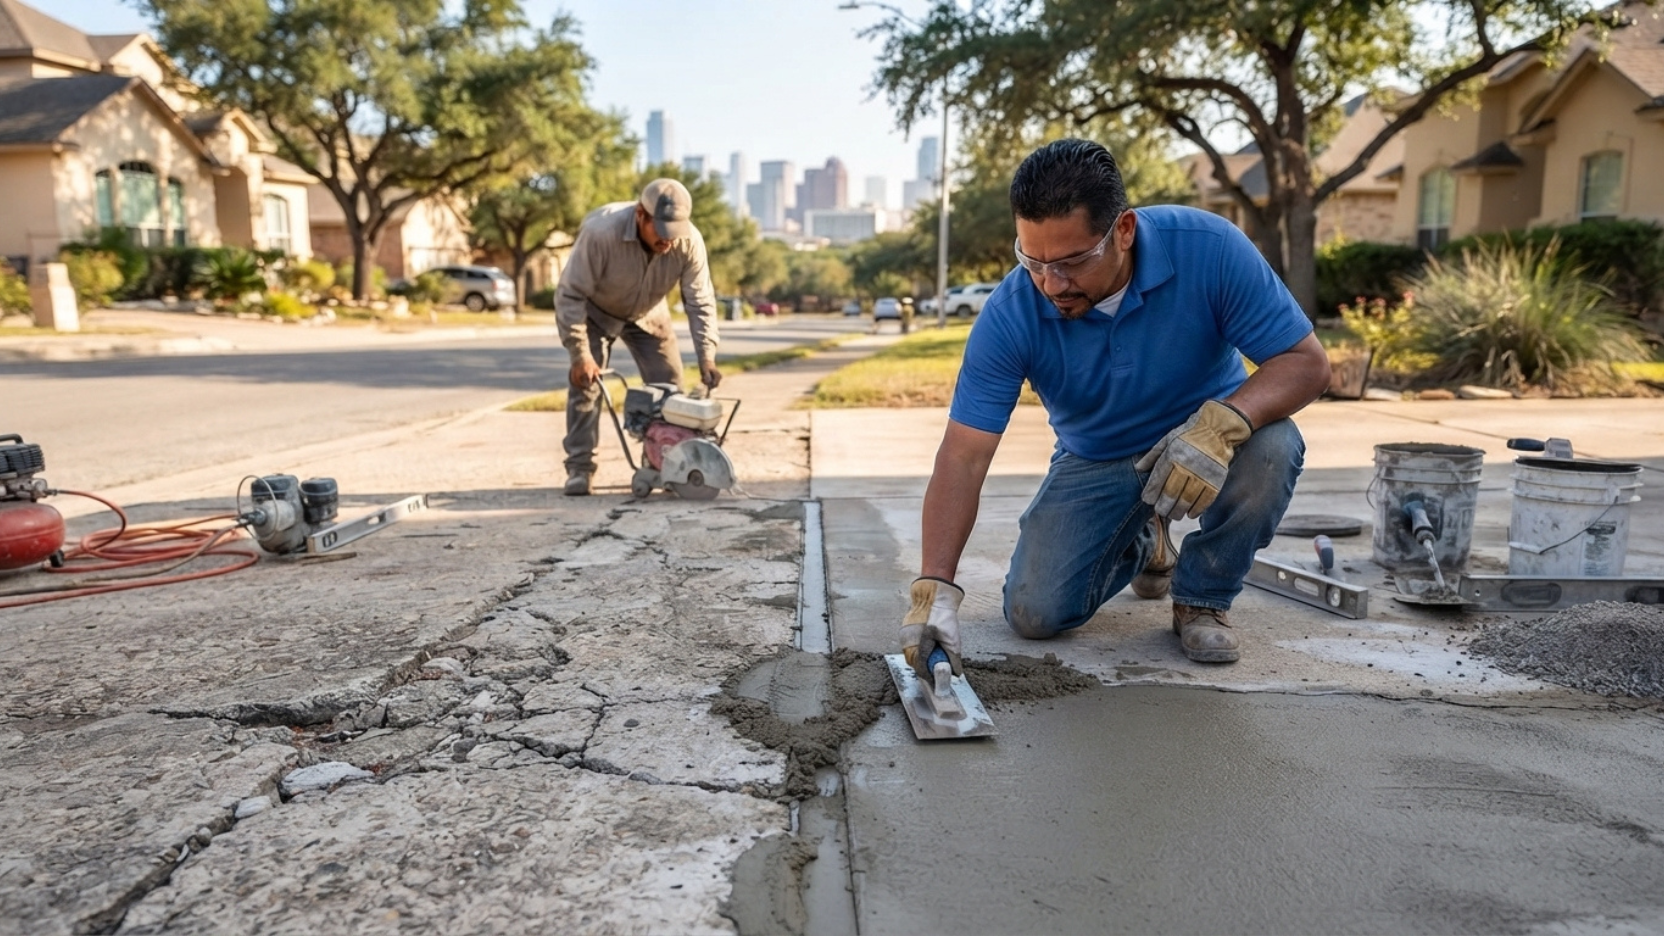
Concrete driveways in San Antonio take a beating from Bexar County clay soils, hard water, intense UV exposure, and seasonal temperature swings. This guide identifies the most common driveway problems local homeowners face and walks through the right repair solution for each one.
A cracked or sunken driveway is one of the most visible maintenance problems a San Antonio homeowner can face and one of the easiest to misdiagnose. The same surface symptom can have two completely different causes, and the wrong repair approach will fail within a season. A crack caused by surface shrinkage needs a flexible filler; a crack caused by base failure needs a full base repair before any surface work is done. Filling the second type without addressing the base is money wasted.
This guide walks through every major driveway problem common to San Antonio and Bexar County homes organized by issue type, cause, and the correct repair approach so you can make an informed decision about what your driveway actually needs before calling a contractor or picking up materials.
Every driveway repair decision in San Antonio has to account for the local soil. Bexar County sits on predominantly expansive Blackland Prairie clay soil that swells when the wet season arrives and contracts when it dries out. This movement is the root cause of the majority of driveway cracking and slab displacement in the area. No surface repair holds long-term if the soil beneath is actively moving. Understanding whether a problem is cosmetic (surface shrinkage), structural (base failure), or drainage-related determines whether a repair is a $500 fix or a full replacement conversation.
Surface Cracks
Hairline cracks those under 1/4″ wide with no vertical displacement between the two sides are extremely common on San Antonio driveways and are almost always the result of normal concrete shrinkage during curing, not structural failure. Concrete loses moisture as it cures and shrinks slightly in the process. In San Antonio’s summer heat, this happens fast, and when it happens faster than the slab can accommodate, fine surface cracks develop.
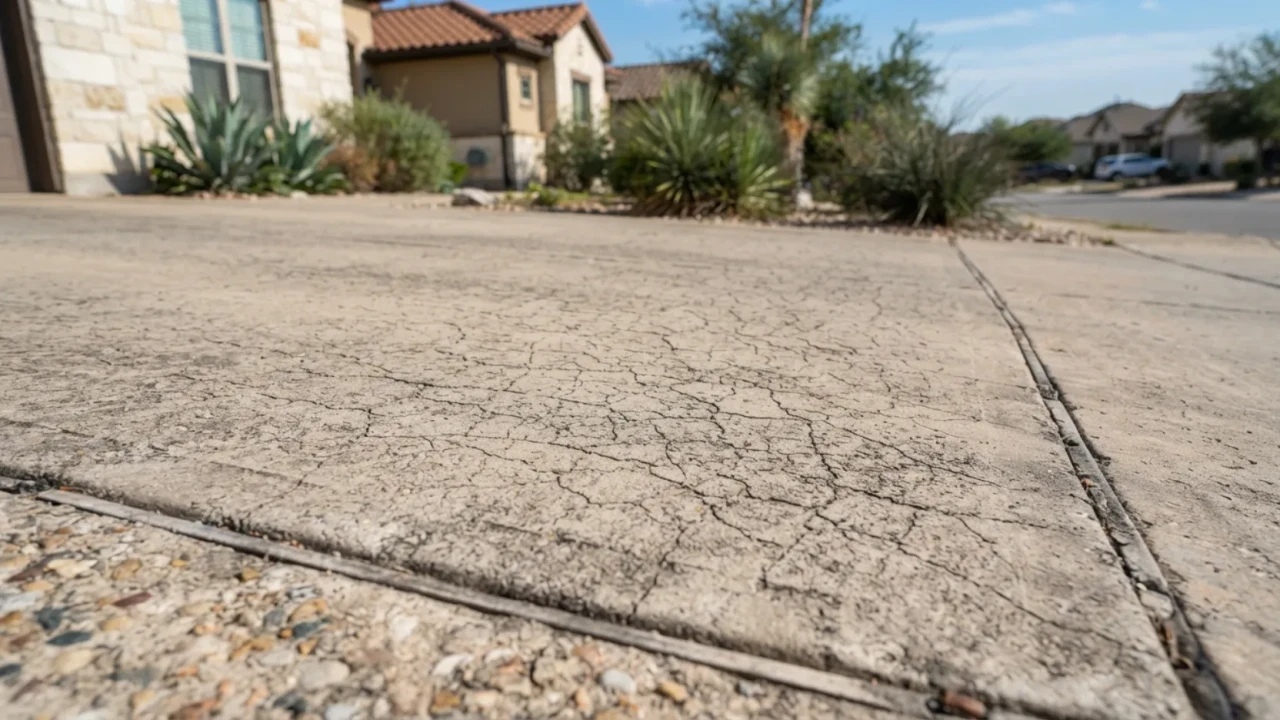
Hairline cracks are primarily a cosmetic issue. However, left untreated in San Antonio’s climate, they become a water entry point. Rainwater works into the crack, reaches the base, and in the clay soils of Bexar County, contributes to the swelling-and-shrinking cycle that widens the crack over time. A crack that is 1/8″ wide today will be 1/4″ wide within two to three wet seasons if left untreated.
The correct filler product for hairline driveway cracks is a flexible polyurethane or semi-rigid polyurea crack filler not a rigid concrete patch compound. Concrete expands and contracts with San Antonio’s temperature swings. A rigid filler will pop out within a season because it cannot flex with the slab. A flexible filler bonds to both sides of the crack and moves with the concrete without separating.
Clean the crack before filling this is the step most DIY repairs skip. Use a wire brush or oscillating tool to clear loose material, then blow out dust with compressed air or a shop vac. A filler applied over dust and debris bonds only to the debris, not the concrete, and will fail within weeks. After filling, apply a concrete sealer over the entire driveway surface sealing the repaired crack alone without sealing the surrounding surface looks patchy and misses the other hairline cracks that are not yet visible to the naked eye.
- Crack measured: confirm it is under 1/4″ wide with no vertical displacement before treating as cosmetic
- Crack cleaned with wire brush and compressed air or shop vac filler applied to clean, dust-free concrete only
- Flexible polyurethane or polyurea filler selected not rigid patch compound or hydraulic cement
- Filler applied in temperatures between 50°F and 90°F for proper cure
- Full driveway sealing scheduled after crack repair not just the crack alone
Structural Cracks
A structural crack is different from a surface shrinkage crack in one defining way: displacement. When you run your hand across a crack and one side is higher than the other even by a small amount the slab sections have moved independently. This is not a surface issue. Something beneath the slab has changed: the base has eroded, the clay soil has shifted, tree roots have pushed from below, or a utility line has settled. No surface repair holds until the cause of movement is addressed.
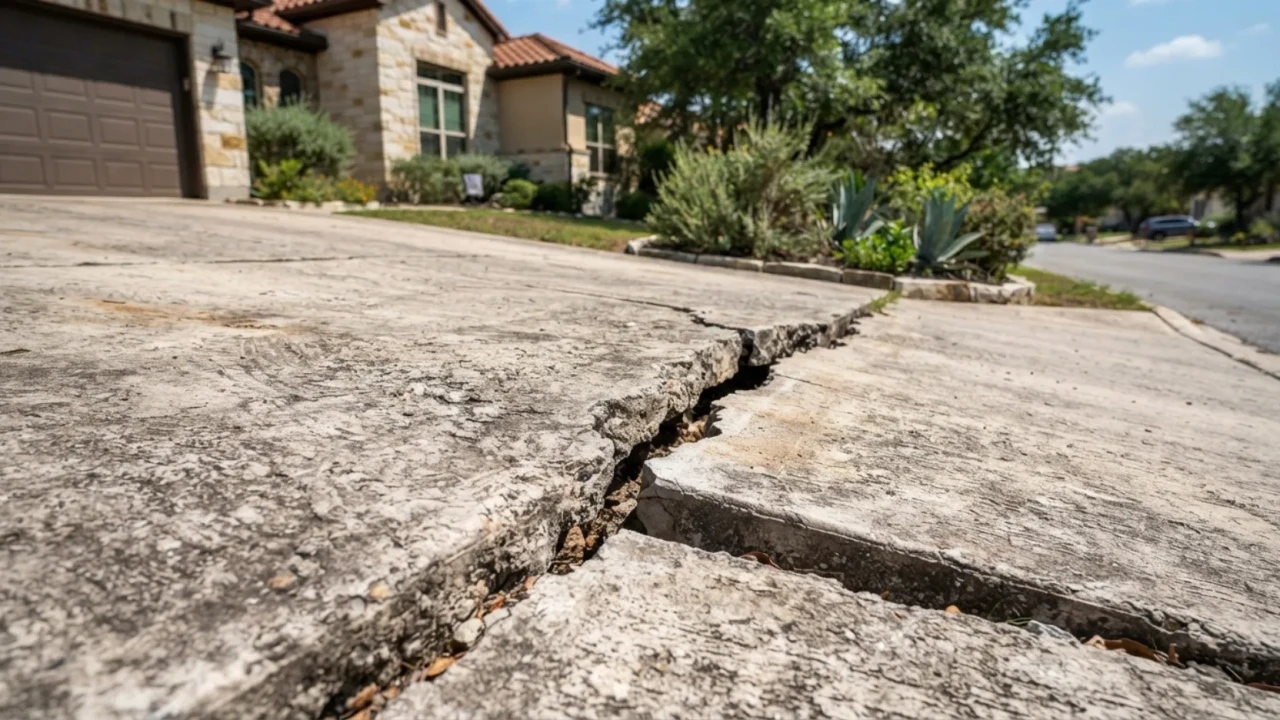
The most common cause of displaced driveway slabs in Bexar County is the Blackland Prairie clay soil that underlies most of San Antonio. This clay expands significantly when wet the wet season brings slab heaving and contracts when dry, leaving voids under the slab. Over seasonal cycles, the slab rocks over these voids until sections break and displace. The second most common cause is tree root intrusion, which can lift slab sections several inches over the span of a few years.
| Repair approach | What it involves | Best for | Cost range (San Antonio) |
|---|---|---|---|
| Mudjacking (slab lifting) | Pumping a grout slurry beneath the slab through drilled holes to fill voids and raise sunken sections | Settled slabs with intact concrete but voids or soft spots beneath | $500–$1,500 per slab section |
| Polyurethane foam lifting | Injecting expanding foam through small holes to lift and stabilize sunken sections lighter and faster than mudjacking | Minor to moderate settlement; preferred for driveways with good concrete condition | $800–$2,000 per slab section |
| Partial slab replacement | Breaking out and replacing the affected slab sections while addressing the base underneath | Severely displaced or crumbled sections where lifting is not viable | $8–$15/sqft for removed and replaced sections |
| Full driveway replacement | Complete demolition, base regrading, and new pour necessary when structural failure is widespread | Driveways with widespread base failure, multiple heaved sections, or concrete older than 30 years | $7–$12/sqft for full replacement |
- Displacement test performed: run a hand or straightedge across the crack any height difference confirms structural movement
- Hollow tap test done: tapping displaced sections with a hammer to listen for void spaces beneath the slab
- Trees within 15 feet of the affected area identified as a potential root cause
- Underground utilities located before any slab lifting or drilling work begins Texas 811 call required
- Base cause addressed first before any surface patching is applied over displaced sections
Spalling
Spalling is the flaking or chipping of the top surface layer of concrete. Unlike cracking, spalling does not indicate base or structural problems it is a surface deterioration issue caused by one of three things: deicing salt damage (rare in San Antonio but possible in colder winters), freeze-thaw cycling on an insufficiently cured slab, or low water-cement ratio during the original pour that left the surface layer weak. In San Antonio, the most common cause is surface finishing that was done too wet adding water to the mix during finishing, which weakens the top layer.
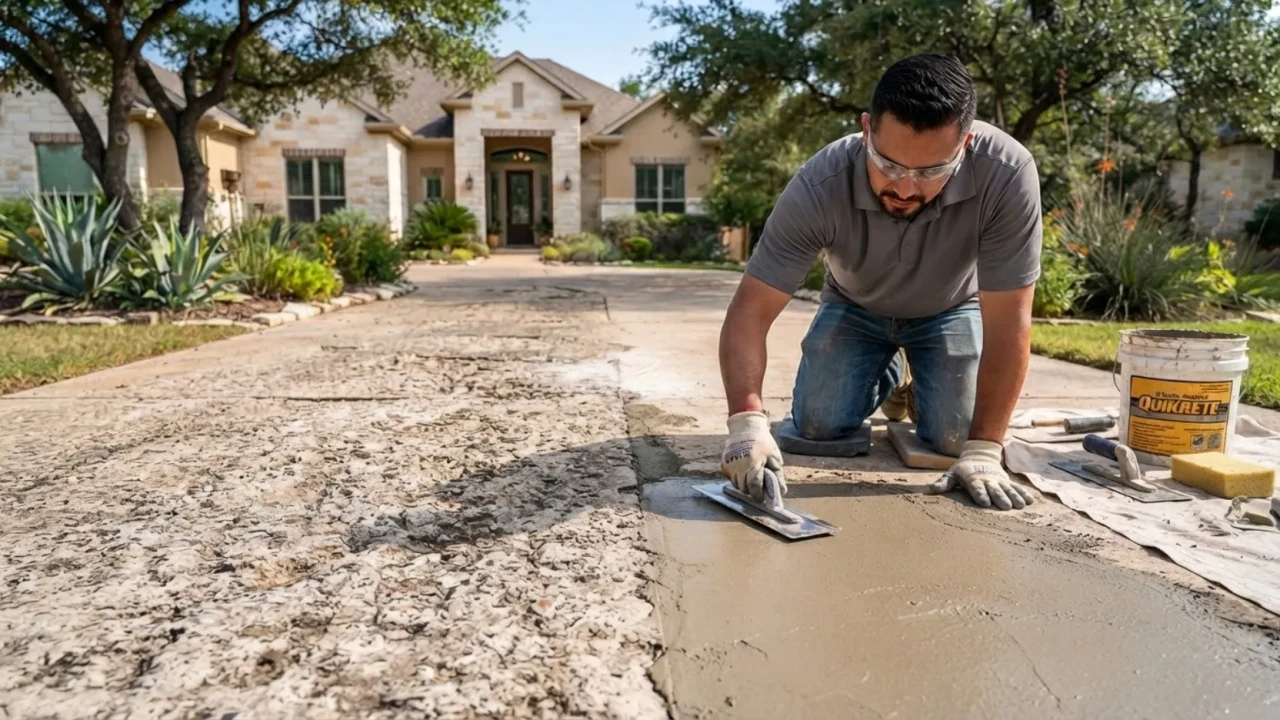
Light spalling pitting and surface roughness without loss of more than 1/4″ of depth is repairable with a concrete resurfacer product. The resurfacer bonds to the existing slab and provides a new surface layer. For moderate to severe spalling where the surface has deteriorated more than 1/4″ deep or where aggregate is exposed and loose, a thicker overlay or partial replacement is the correct approach.
Surface preparation is the critical step for any spalling repair. Loose and flaking material must be removed completely before any resurfacer is applied. Grinding the surface with a diamond cup wheel removes loose aggregate and opens the pores for proper bonding. A resurfacer applied over loose material will bond to the debris and de-laminate within a season. Mechanical prep is not optional when repairing spalled concrete.
- Spalling depth measured: under 1/4″ is resurfacer territory; deeper requires overlay or replacement assessment
- All loose and flaking material removed by grinding before any product is applied
- Bonding agent applied per manufacturer instructions this step is frequently skipped and causes resurfacer failure
- Resurfacer or overlay product specified as polymer-modified for exterior use and temperature durability
- New surface sealed after cure resurfaced concrete is more porous than the original slab and requires sealing within 30 days
Settlement
A sunken driveway section is one where part of the slab has dropped below the surrounding concrete, creating a low point that collects water. Unlike a heaved section, a sunken section means material has been lost or compressed beneath the slab the base has either eroded away through poor drainage, washed out during heavy rain, or the original compaction was inadequate. In San Antonio, poor drainage combined with clay soil creates conditions where water pools, saturates the base, and the slab drops over time.
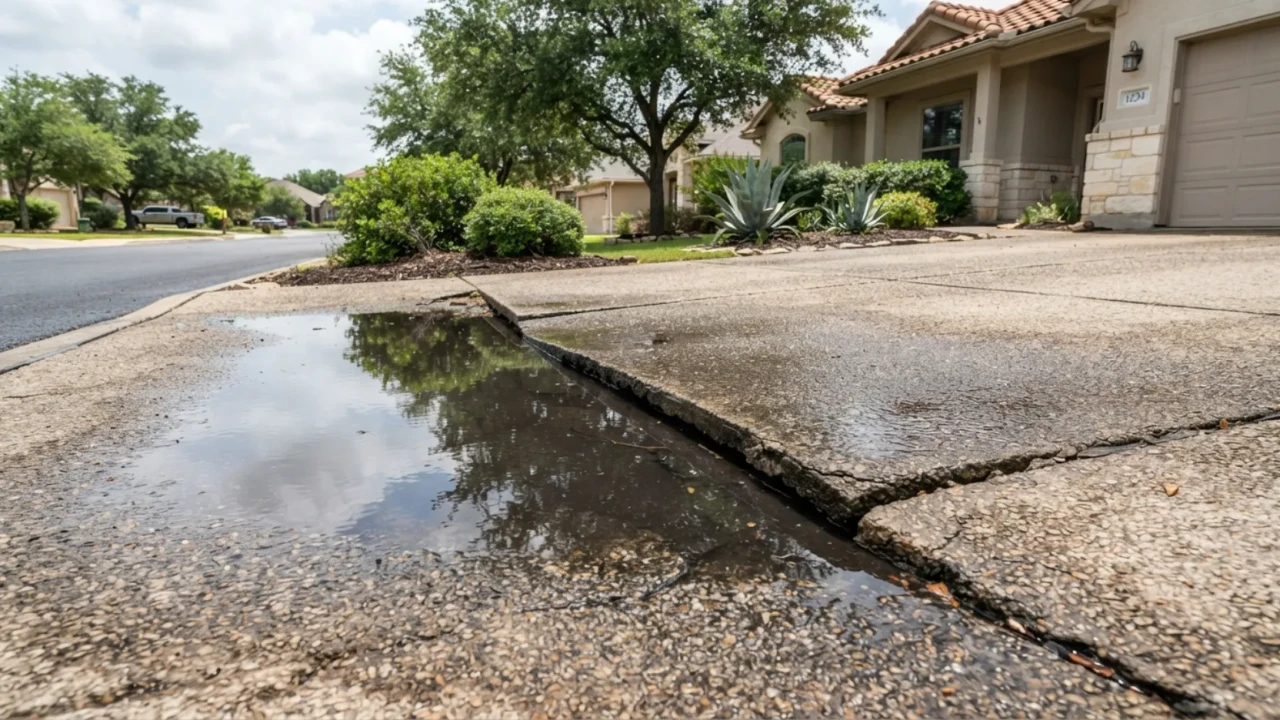
The most important step before repairing a sunken section is identifying where the drainage problem originates. If water is pooling against the driveway because downspout extensions are directing water onto the slab, or because the yard grade has shifted and now funnels runoff under the driveway, lifting the slab without fixing the drainage source means the base will erode again within a few wet seasons.
For sections that have sunk less than 2 inches with the concrete slab still intact, slab lifting (mudjacking or polyurethane foam injection) is the most cost-effective repair. For sections that have sunk more than 2 inches or where the concrete has cracked into multiple pieces during settlement, partial replacement with proper base regrading is the correct approach. Lifting a badly fragmented slab section simply redistributes the broken pieces.
The most overlooked cause of sunken driveways in San Antonio: downspout positioning. A downspout that terminates at grade level next to a driveway panel saturates the same base section every time it rains. Over five to ten years, this washes fine material from the base, leaving voids. Check every downspout adjacent to your driveway and extend any that terminate within 6 feet of the slab to discharge at least 6 feet away from the driveway edge. This single change eliminates the most common cause of repeated slab settlement in residential San Antonio.
- Drainage source identified and addressed before any slab lifting work is authorized
- Downspouts checked: all extensions discharge at least 6 feet from the driveway slab
- Settlement depth measured: under 2″ with intact concrete is a candidate for lifting; over 2″ or fragmented requires replacement
- Void confirmed with hollow tap test before choosing between mudjacking and foam lifting
- Texas 811 utility locate call made before any drilling or lifting equipment is used
Joint Repair
Expansion joints and control joints are intentional separations built into a concrete driveway to give the slab a controlled place to move and relieve internal stress. Expansion joints (fully open gaps, typically filled with a compressible backer and sealant) allow adjacent sections to expand and contract independently. Control joints (saw cuts that weaken the slab at a specific line) encourage cracking to happen in a straight, manageable line rather than randomly across the surface. Both types fail over time in San Antonio’s heat and UV environment, and failed joints are one of the most common causes of random mid-slab cracking.
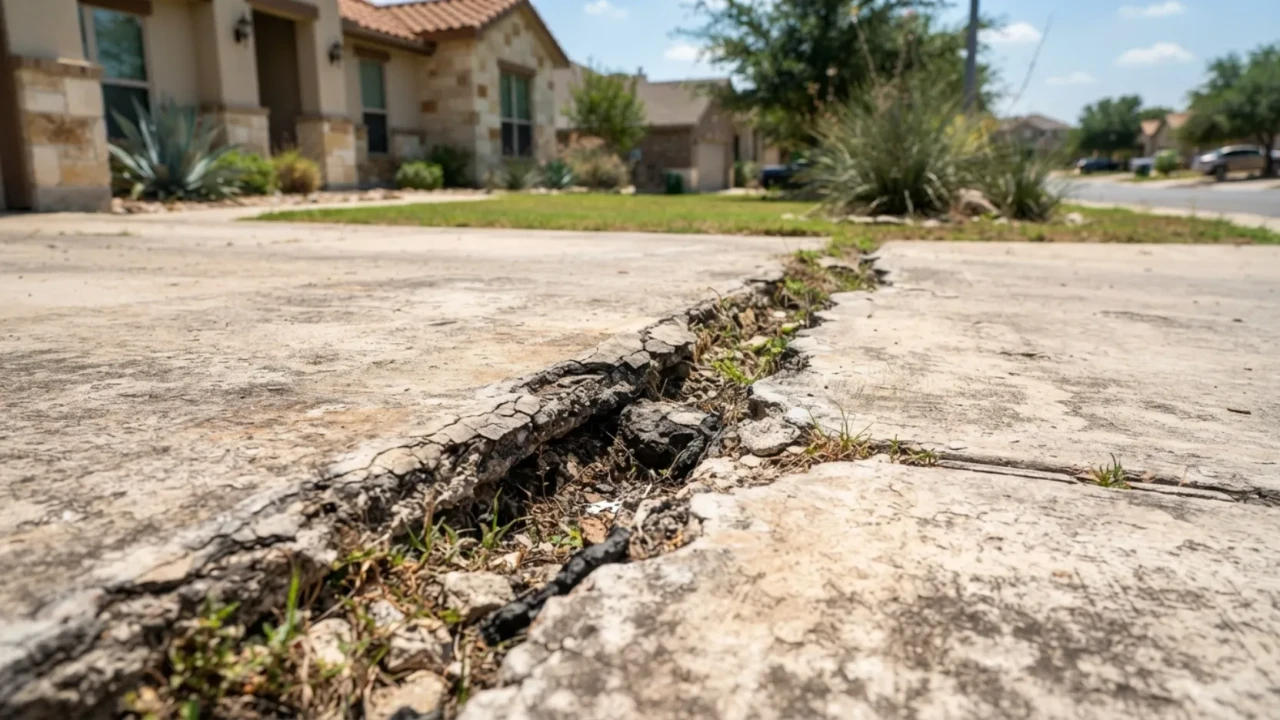
When joint sealant hardens, shrinks, or falls out, water and debris fill the gap. Debris prevents the slab from expanding, which builds internal pressure until the concrete cracks somewhere other than the joint often right across the middle of a panel. Water in the joint reaches the base and accelerates clay soil movement. Joint maintenance is one of the highest-value, lowest-cost preventive repairs a driveway can receive.
The correct repair sequence for a failed expansion joint is: remove all old sealant and debris using a joint saw or oscillating tool, vacuum out loose material, install a foam backer rod sized to fill 2/3 of the joint depth, then apply a self-leveling polyurethane joint sealant over the backer rod. The backer rod is what most DIY repairs skip without it, the sealant is applied too deep, bonds to the bottom of the joint instead of just the two sides, and tears out when the joint moves. Sealant bonded to three sides cannot flex; sealant bonded to two sides performs correctly.
- All joints inspected annually: check for cracked, hardened, separated, or missing sealant
- Debris removed completely before resealing: packed sand and gravel must come out, not be sealed over
- Backer rod installed before sealant: sized to 1.25x the joint width to fit snugly at 2/3 joint depth
- Self-leveling polyurethane sealant selected for horizontal driveway joints not caulk gun sealant, which does not level to a flush finish
- Sealant applied in shade or during cooler part of day: direct sun causes too-fast skinning that prevents proper flow
Drainage
A concrete driveway should be sloped to drain typically 1/8″ per foot minimum, directing water away from the foundation and off the slab edges. When sections settle, soil grade changes, or the original pour was installed without adequate slope, water sits on the surface. Standing water accelerates every other driveway problem: it finds its way into cracks, saturates the base, contributes to slab settlement, and in winter, creates ice hazards at the garage door apron and at the street connection point.
Low spots in an otherwise serviceable driveway can be addressed with a grinding-and-overlay approach rather than full slab replacement. A contractor can diamond grind the high surrounding areas and feather in a concrete overlay to build up the low point and restore proper drainage slope. This is significantly less expensive than removing and replacing the affected panel and is appropriate when the slab’s structural integrity is sound.
The garage door apron is the highest-risk drainage point on most San Antonio driveways. The apron the section of driveway directly in front of the garage door is where water pools if the grade tilts even slightly back toward the house. Once water reaches the garage door threshold, it works under the door seal, gets into the garage, and if it reaches the foundation wall, contributes to the slab-on-grade moisture problems common in Bexar County homes. A channel drain cut into the apron at the garage door line is a one-time fix that eliminates this risk permanently.
- Driveway slope measured after the next rain: water should run off within 2 minutes on a properly sloped surface
- Garage door apron inspected for reverse slope: any water pooling at the door line needs a channel drain assessment
- Downspouts and gutter discharge points mapped relative to driveway panels each one is a potential base erosion source
- Low spot depth measured: under 1/2″ is overlay territory; over 1/2″ may require slab lifting or panel replacement
- Yard grade adjacent to driveway assessed: landscaping changes, settling soil, or mulch buildup can redirect runoff onto the slab
The repair-vs-replace decision comes down to three factors: the extent of structural failure, the age and condition of the concrete, and the total cost comparison between targeted repair and a full replacement pour. Use this table as a starting framework before getting contractor quotes.
| Condition | Repair appropriate? | Replacement indicated? | Estimated cost comparison |
|---|---|---|---|
| Hairline cracks, no displacement | Yes flexible filler and sealing | Not warranted | $200–600 repair vs. $7–12/sqft replacement |
| One or two displaced sections | Yes slab lifting or section replacement | Not unless widespread | $500–2,000 vs. full replacement cost |
| Light to moderate spalling, intact slab | Yes resurfacer or overlay | Not warranted | $2–7/sqft overlay vs. $7–12/sqft replacement |
| Multiple displaced sections, widespread cracking | Partial repair possible but may not be cost-effective | Yes when repair covers more than 30% of total area | Repair cost approaches replacement: compare quotes |
| Driveway older than 30 years with widespread issues | Limited repairs will not address underlying deterioration | Yes long-term value favors replacement | Full replacement $7–12/sqft; 25+ yr service life resets |
| Failed joints, no cracking | Yes joint cleaning and resealing | Not warranted | $150–400 for joint maintenance vs. full replacement |
| Standing water, intact slab | Yes slab lifting or drain installation | Only if combined with structural failure | $300–1,500 drainage fix vs. $7–12/sqft replacement |
- All cracks measured for width: under 1/4″ is cosmetic; at or above 1/4″ requires structural review
- Displacement test completed on every crack: run a hand across each crack to detect vertical height difference between sides
- Crack pattern mapped: random mid-panel cracks suggest failed joints; edge cracks suggest base erosion or drainage issues
- Crack growth monitored if possible: mark both ends of active cracks with a pencil date mark and check after 90 days
- Hollow tap test performed on all sections: a hollow sound indicates a void beneath the slab
- Trees within 15 feet of the driveway identified and noted for the contractor root intrusion changes the repair approach
- Utility locate (Texas 811) completed before any contractor drills, lifts, or excavates around the driveway
- Slab age estimated: driveways over 30 years with multiple issues warrant a full replacement cost comparison
- Drainage check completed after rain: any standing water 2 minutes after rain stops indicates slope or low-spot problem
- Garage apron grade checked: no water should pool at the door threshold line
- All downspout discharge points located and noted: any within 6 feet of the slab are potential erosion sources
- Joint condition inspected: missing, cracked, or debris-filled sealant in all expansion and control joints
- Contractor specifies the cause of each problem in writing, not just the surface symptom
- Base repair or drainage fix is included in the scope before any surface patching is applied
- Repair products named specifically: flexible polyurethane filler, polymer-modified resurfacer, or polyurethane joint sealant not generic “concrete patch”
- Certificate of insurance received from every contractor quoting the work $1M general liability minimum
- Payment terms confirmed: deposit upfront, balance on completion and inspection not full payment before work begins
How much does driveway crack repair cost in San Antonio?
Is it better to repair or replace a cracked driveway in San Antonio?
Why do concrete driveways crack so often in San Antonio specifically?
Can I repair a concrete driveway myself, or should I always use a contractor?
How do I prevent my driveway from cracking again after repair?
Get a free driveway repair quote in San Antonio
Tell us about your driveway problem cracks, settling, spalling, or drainage. We will assess the slab in person, identify the cause, and give you a detailed written repair quote at no cost.