
A concrete driveway in San Antonio faces a specific set of threats: Blackland Prairie clay that shifts with every rain cycle, Edwards Aquifer hard water that leaves mineral deposits, and Texas summer UV that breaks down sealers faster than anywhere in the country. This pillar guide covers every maintenance task, every season, with San Antonio-specific timing and product guidance.
Most concrete driveways in San Antonio fail for one reason: neglect. Not bad concrete, not a bad pour, not the soil neglect. A driveway that never gets sealed, never gets its cracks filled, and never gets a proper cleaning will look rough by year 8 and require major repair or replacement by year 15. The same driveway, maintained correctly, will still look clean and solid at year 30 or beyond.
The good news is that concrete maintenance in San Antonio is straightforward once you understand the local variables. You are not dealing with freeze-thaw spalling the way northern homeowners do. What you are dealing with is UV degradation of sealers, clay soil movement that stresses control joints, hard water mineral staining from Edwards Aquifer water, and summer heat that accelerates surface oxidation. Once you understand those four factors, the maintenance schedule writes itself.
Sealing is not optional in San Antonio. The combination of intense UV radiation, summer temperatures that routinely exceed 100 degrees Fahrenheit, and slightly acidic rainwater means an unsealed concrete surface oxidizes and degrades measurably faster than in milder climates. A quality penetrating silane-siloxane sealer applied within 28-30 days of your original pour, and reapplied every 2-3 years after that, is the single maintenance task that most dramatically extends driveway life. Everything else in this guide is secondary to this one step.
San Antonio’s climate does not follow a traditional four-season pattern. What matters for concrete maintenance is the wet season (spring rains, March through May), the brutal dry heat of summer (June through September), the mild but occasionally freezing fall-winter window (October through February), and the clay soil behavior that follows each rainfall event.
- Pressure wash winter grime and algae
- Inspect control joints after wet season
- Fill hairline cracks before summer heat
- Apply sealer if 2-3 years have passed
- Degrease oil stains before they set
- Avoid sealing in peak heat (above 90 F)
- Rinse down after heavy rain events
- Check for clay-movement cracking
- Keep vehicle fluids off unprotected surface
- Monitor joint sealant for UV breakdown
- Best window to seal or reseal driveway
- Clean and refill control joints
- Address any cracks before winter rains
- Remove leaf stains before they bond
- Inspect edges and apron for settling
- Avoid deicing salts use sand for traction
- Inspect after any freeze event for spalling
- Rinse off fertilizer and organic debris
- Check garage apron drainage after rains
- Plan spring maintenance tasks now
Sealing

In San Antonio, concrete sealer is not a cosmetic upgrade. It is a functional barrier between your driveway surface and the four primary destructive forces in this climate: UV radiation, Edwards Aquifer hard water minerals, petroleum products from vehicles, and the mechanical stress that comes from clay soil expansion and contraction beneath the slab.
The first seal goes on at 28 to 30 days after the original pour never before, because the concrete is still hydrating and an early sealer traps moisture inside the slab. After that, the resealing interval depends on the product type: penetrating silane-siloxane sealers typically last 3 to 5 years in San Antonio conditions; acrylic topcoat sealers break down faster under Texas UV and typically need refreshing every 2 to 3 years.
- First seal at 28-30 days post-pour confirm concrete is fully cured before applying
- Surface clean and dry pressure wash 24-48 hours before applying sealer
- Application temperature confirmed: surface must be between 50-90 degrees Fahrenheit
- No rain in the 24-hour forecast after application
- Two thin coats applied with a pump sprayer or roller never one thick coat
- Vehicle traffic restricted for 48 hours after final coat
Cleaning

Concrete is porous. Without proper sealing, it absorbs stains from motor oil, tire rubber, lawn fertilizer, and the dissolved minerals in San Antonio’s hard tap water. Once a stain penetrates more than 1/4 inch into the slab, surface cleaning will not fully remove it. The goal of regular cleaning is to prevent stains from reaching that depth.
San Antonio homeowners deal with a staining challenge that homeowners in softer-water cities do not: Edwards Aquifer water is among the hardest in the United States, with dissolved calcium and magnesium levels that leave white mineral deposits on any concrete surface exposed to irrigation overspray or garden hose runoff. These deposits look like bleached patches and require acid-based cleaners to remove properly.
| Stain type | Recommended cleaner | Application method | Notes |
|---|---|---|---|
| Motor oil / grease | Concrete degreaser (Purple Power, Simple Green D Pro) | Soak 10-15 min, scrub with stiff brush, rinse thoroughly | Act within 48 hours before oil penetrates deeper than the surface layer |
| Hard water / mineral deposits | Diluted muriatic acid (1:10) or commercial calcium remover | Apply, wait 5 min, scrub, rinse immediately and thoroughly | Wear gloves and eye protection. Neutralize with baking soda and water rinse after |
| Tire rubber marks | Degreaser + pressure washer (2,000-3,000 PSI) | Apply degreaser, wait 5 min, pressure wash at 25-degree tip angle | Sealed surfaces release tire marks more easily unsealed concrete holds them permanently |
| Organic staining (leaves, algae, mildew) | Oxygen bleach (OxiClean) diluted in water | Apply to wet surface, scrub after 15 min, rinse | Do not use chlorine bleach on sealed or decorative surfaces degrades acrylic sealers |
| Rust stains | Oxalic acid or commercial rust remover for concrete | Apply, wait 10-15 min, scrub with brush, rinse | Common around metal irrigation heads and steel edging in San Antonio landscapes |
| General dirt and grime | Pressure washer at 1,500-2,000 PSI | 25-degree tip, consistent sweeping motion, 6-8 inches from surface | Annual pressure washing is sufficient for sealed driveways in good condition |
The Edwards Aquifer hard water problem is bigger than most San Antonio homeowners realize. If your driveway is within irrigation overspray range, you are depositing dissolved calcium and magnesium on the surface with every watering cycle. Over a few seasons, this builds into a visible white crust that is genuinely difficult to remove once it bonds. The fix is simple: adjust your sprinkler heads so they do not overspray onto the concrete surface. If you already have significant buildup, a diluted muriatic acid wash followed by a thorough rinse and resealing will reset the surface. Do this before resealing, not after.
- Annual pressure washing minimum spring or fall before resealing window
- Oil and grease stains treated within 48 hours of occurrence
- Irrigation heads adjusted to prevent hard water overspray on concrete surfaces
- Mineral deposit buildup removed with acid-based cleaner before resealing
- Pressure washer tip at 25 degrees never zero-degree (pencil) tip on concrete surface
Crack Repair

San Antonio’s Blackland Prairie Vertisol clay is one of the most expansive soil types in the United States. It swells measurably when wet and shrinks and cracks when dry. This movement does not stop when concrete is poured over it it continues through the life of the slab. Understanding what kind of crack you are dealing with determines whether you need a $15 tube of filler or a contractor assessment.
Hairline cracks under 1/4 inch wide with no vertical displacement are normal shrinkage cracks. They are primarily cosmetic and can be filled with a concrete crack filler or caulk-style polyurethane product. Cracks wider than 1/4 inch, cracks that grow over time, or cracks where one side is higher than the other indicate soil movement or base failure and require professional evaluation before any surface repair is attempted.
- Measure crack width: under 1/4 inch is cosmetic; over 1/2 inch needs contractor evaluation
- Check for vertical displacement: place a straight edge across the crack any height difference is a structural flag
- Monitor crack over 30 days: if it grows, the cause is active and still needs to be addressed
- Clean crack thoroughly before filling: remove loose debris, blow out with compressed air or vacuum
- Use polyurethane filler for flexibility rigid cement patch cracks again quickly in expansive clay soil
- Fill cracks before resealing never seal over an open crack
Control Joints

Control joints are the intentional cuts or grooves in a concrete driveway, typically spaced every 8 to 10 feet. Their job is to give the slab a planned place to crack when the concrete expands and contracts with temperature changes and soil movement directing cracking to a controlled location rather than letting it run randomly across the surface.
In San Antonio’s clay-heavy soil, control joints work harder than in most cities. The Vertisol clay underneath the slab can move 2 to 4 inches vertically over the course of a wet and dry cycle significant stress on any concrete surface. When the joint sealant inside a control joint dries out, cracks, or pops out entirely, the joint can no longer do its job. Water then enters the joint, saturates the clay below, and accelerates the very movement the joint was designed to control.
Inspect control joints annually the best time is fall before the wet season. The original joint filler is typically a flexible polyurethane or silicone compound that does not bond to the concrete permanently. It will degrade over time from UV exposure and soil movement. When it cracks, pulls away from the joint walls, or begins to crumble, it needs to be removed and replaced.
Never fill a control joint with cement patching compound. A rigid cement fill defeats the entire purpose of the joint it cannot flex when the slab moves, so it cracks immediately and leaves you with a worse situation than before. The correct product is a self-leveling polyurethane joint sealant, which remains flexible after curing. This allows the joint to continue absorbing slab movement. Backer rod foam should be set below the surface first so the sealant does not bond to the bottom of the joint a three-point bond causes the sealant to tear rather than flex.
- Annual visual inspection of all control joints look for cracked, missing, or pulled-away sealant
- Remove old failed sealant completely before refilling a wire brush or oscillating tool works well
- Install foam backer rod below surface level to prevent three-point bonding
- Fill with self-leveling polyurethane joint sealant never rigid cement compound
- Allow 24 hours to cure before vehicle traffic over refilled joints
- Address failed joints before the wet season open joints allow water to saturate clay below the slab
Edge and Drainage

The edges of a concrete driveway are its most vulnerable point. The slab center is supported by the base below it. The edges have soil on one side and air on the other and in San Antonio’s clay environment, the soil on that edge side expands when wet and pulls away when dry, leaving the driveway edge unsupported. Over time, the unsupported edge cracks and chips under vehicle load.
Drainage slope is equally critical. A properly poured driveway has a 1/8 inch per foot slope away from the garage enough to direct rainwater off the surface rather than letting it pool. If your driveway was poured without adequate slope, or if settling has reversed that slope toward the garage, water will pond near the foundation. In San Antonio’s Blackland Prairie clay, that standing water saturates the soil, triggers expansion, and then leaves it loose and unsupported when dry. Both conditions damage the slab.
Driveway edges that have lost soil support need to be protected. Pack firm, compacted fill soil against the edge to re-establish ground contact. If the edge has already cracked or chipped, a concrete edge repair mortar (not regular mortar a flexible polymer-modified concrete repair compound) can rebuild the profile. Edges protected by metal or plastic edging strips hold up better than exposed concrete edges in high-traffic areas.
- Inspect driveway edges twice per year for chipping, undercutting, or soil pullaway
- Pack compacted soil against edges where ground has settled away from the slab
- Confirm drainage slope: water should sheet off the driveway within 30 minutes of a rain
- Address any area where water ponds near the garage foundation consult a contractor if slope cannot be corrected with surface maintenance
- Chip and crack repairs on edges: use polymer-modified concrete repair mortar, not standard mortar
- Adjust irrigation heads to eliminate overspray onto driveway surface and edges
Winter Care

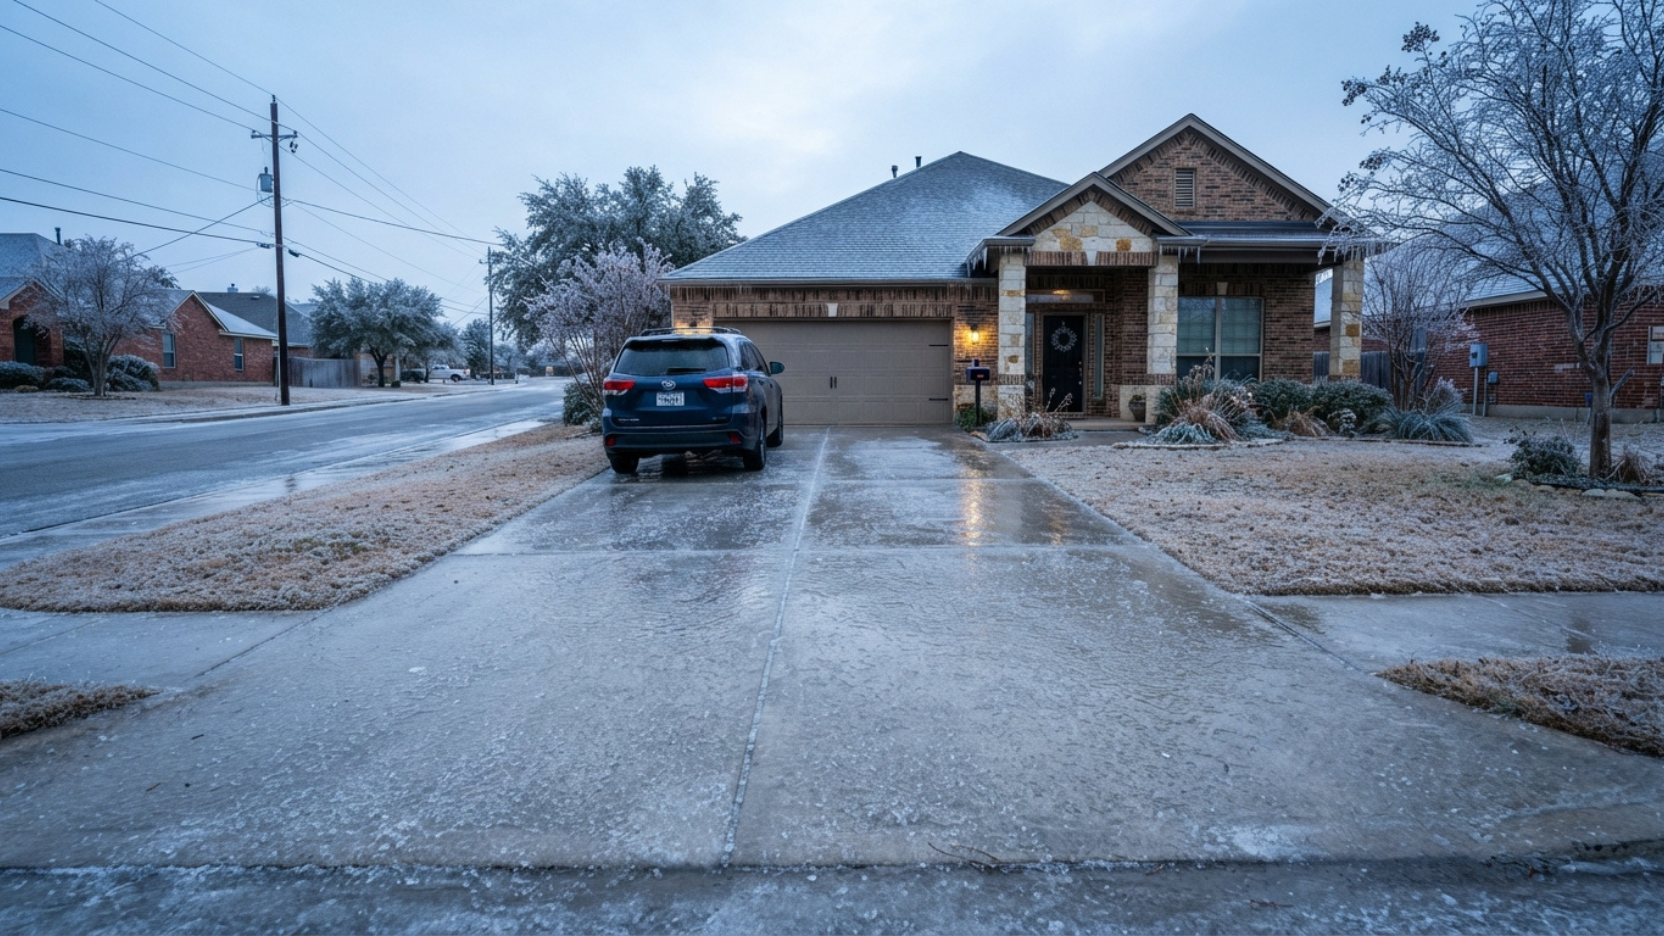
San Antonio does not get the severe freeze-thaw cycling that destroys concrete in northern states. However, the historic freeze events of February 2021 and similar cold snaps demonstrated that Bexar County concrete can face genuine freeze stress when temperatures drop below 20 degrees Fahrenheit for multiple days.
The number one mistake San Antonio homeowners make during ice events: applying deicing salt or calcium chloride to their concrete driveways. These products are standard in northern states, but they are highly damaging to concrete. Salt pulls moisture into the concrete, increases internal pressure as that moisture freezes, and degrades both the surface and the sealer. In San Antonio, where ice events are rare and short-lived, sand is the correct answer for traction not salt.
After a hard freeze event in San Antonio, walk your driveway once temperatures are back above freezing and look for two things: surface spalling (concrete surface flaking or popping away in thin layers) and new cracks or expansion of existing cracks. Spalling on a sealed surface is rare it is almost always a sign of deicing salt use or a surface that was sealed too early. New cracks after a freeze typically indicate the freeze accelerated existing base movement. Document any new damage with photos and address it in the spring before the clay season begins.
The best winter preparation for a San Antonio driveway is a fall resealing. A fresh sealer coat applied in October or November gives the surface maximum moisture protection going into the wet winter months. An unsealed or under-sealed surface during a hard freeze absorbs water, which then expands as ice. The surface spalling that results is largely preventable with proper sealer coverage. If your driveway has not been sealed in the last 3 years and a cold snap is forecast, the urgency of that resealing has just increased significantly.
- Fall resealing completed before December your best freeze protection is a fresh sealer coat
- Sand or grit on hand for ice events deicing salts never used on concrete surfaces
- Post-freeze inspection: check for new cracks, spalling, or joint sealant failure once temperatures rise
- Document any new damage with photos before spring maintenance window
- Do not attempt crack repairs while temperatures are below 50 degrees Fahrenheit repair compounds do not cure properly in cold weather
These are realistic 2026 cost ranges based on a standard 2-car concrete driveway in Bexar County, approximately 400 to 600 square feet. Prices reflect both DIY supply costs and professional service quotes in the San Antonio market.
| Maintenance task | DIY cost (materials only) | Professional cost (labor + materials) | Frequency |
|---|---|---|---|
| Sealing (penetrating silane-siloxane) | $60-$120 | $160-$250 | Every 3-5 years |
| Sealing (acrylic topcoat, decorative) | $80-$160 | $200-$400 | Every 2-3 years |
| Pressure washing | $0 (owned equipment) | $100-$200 | Once per year |
| Hairline crack repair (per crack) | $12-$25 | $75-$150 | As needed |
| Control joint reseal (full driveway) | $30-$60 | $120-$200 | Every 5-7 years |
| Oil stain degreasing | $10-$25 (commercial degreaser) | $50-$100 | As needed, within 48 hours |
| Hard water mineral removal | $15-$30 (acid wash supplies) | $80-$150 | Every 2-3 years or as needed |
| Edge repair (polymer mortar) | $20-$50 (bag mix) | $150-$350 | As needed |
- Pressure wash the full driveway surface remove winter organic debris, algae, and sediment
- Inspect all control joints for failed or missing sealant after spring rains
- Survey for new cracks from winter movement measure and document width
- Fill hairline and moderate cracks with polyurethane filler before summer heat sets them in
- Apply sealer if it has been 2-3 years since last application (acrylic) or 3-5 years (penetrating)
- Adjust irrigation heads to eliminate driveway overspray before the summer irrigation season
- Avoid sealing or applying repair products during peak heat above 90 degrees Fahrenheit surface temp
- Address oil and grease stains within 48 hours do not allow summer heat to bake stains deeper
- Rinse down driveway after heavy storm events to remove clay sediment before it bonds
- Check for new edge chipping or cracking from seasonal clay expansion
- Monitor control joints for any movement or gap widening from thermal expansion
- Best window for resealing surface temps 50-80 degrees Fahrenheit, low humidity
- Clean surface thoroughly and perform acid wash if hard water mineral buildup is visible
- Refill all control joints with fresh polyurethane sealant before winter rains begin
- Address any edge cracking or chip repairs before wet season moisture accelerates the damage
- Remove leaf staining and organic debris before winter organic acids bond quickly in cool conditions
- Confirm drainage slope is directing water away from garage and foundation
- Keep sand or grit on hand for ice traction no deicing salts on concrete under any circumstances
- Post-freeze walkthrough after any hard freeze event: check for spalling, new cracks, joint failure
- Do not attempt crack or surface repairs below 50 degrees Fahrenheit materials will not cure properly
- Rinse fertilizer and lawn product overspray off the driveway within 24 hours
- Plan and schedule spring maintenance tasks based on fall inspection findings
How often should I seal my concrete driveway in San Antonio?
Why is my concrete driveway cracking and what can I do about it?
Can I use regular bleach to clean white stains off my concrete driveway?
My concrete driveway is 15 years old and has never been sealed. Is it too late to start?
What PSI should I use when pressure washing my concrete driveway?
Should I be worried about my concrete driveway after a San Antonio freeze event?
Need a concrete driveway inspection or repair in San Antonio?
Whether you need a crack assessment, a professional resealing, or a full driveway replacement quote, our Bexar County crew is available for free on-site evaluations across San Antonio and surrounding areas.